Connect Stick can't be detected - "Detecting Connect stick..." Resolution 2: Enable the virtual COM port
Occasionally, Windows ends up using the incorrect driver for the Connect stick. This is typically caused by the device being plugged in before the correct driver has been installed.
If the device is listed as a “USB Serial Converter” under the “Universal Serial Bus
controllers” list in Windows Device Manager, all we might need to do is to enable it as a
virtual COM port device.
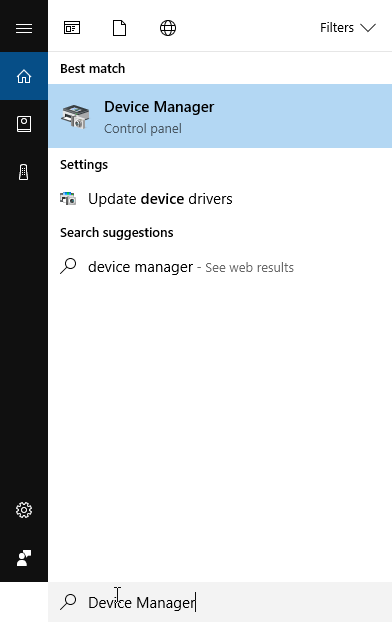
Step 1: Open Device Manager
Move your Mouse pointer to the lower left corner of the screen and type “Device
Manager”. Click on the “Device Manager” as shown in Blue in the screenshot below.

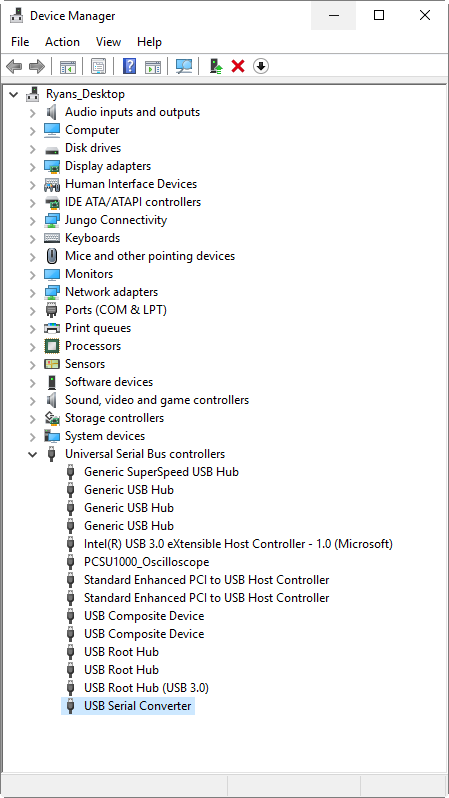
Step 2: Examine the USB to Serial Converter Settings
With your USB device plugged in, Expand the “Universal Serial Bus controllers” list to
reveal “USB Serial Converter”. Right click on “USB Serial Converter” and select
“Properties”.

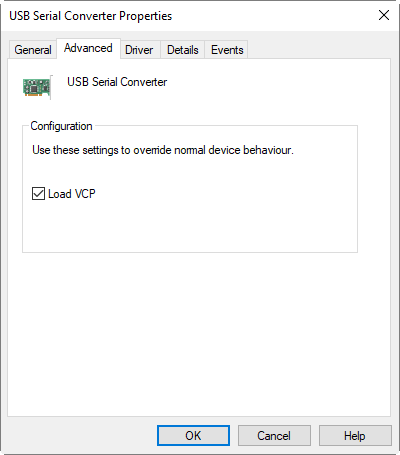
Step 3: Load the VCP Driver
After opening the Properties for the device, click on the “Advanced” tab and ensure the
“Load VCP” option is checked. Once checked, click OK.

Step 4: Reconnect your USB Device
Disconnect the USB device and reconnect. The device should now be visible to your
operating system.
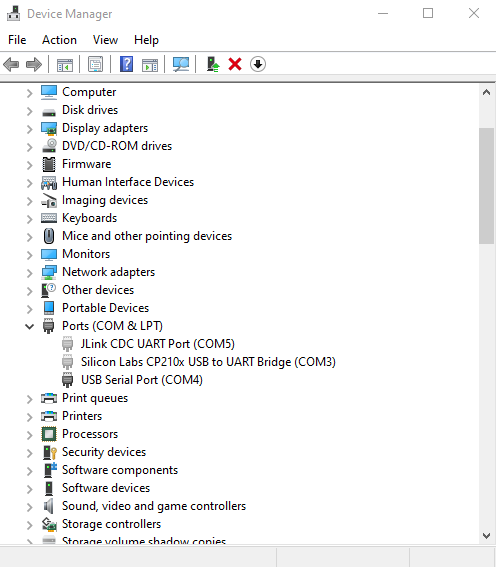
If all goes well, your Virtual COM Port Driver will be loaded and ready to run. It should
be listed as a COM port device under “Ports (COM & LPT)” in Device Manager, e.g.: “USB
Serial Port (COM4)”.

Step 5: Restart Connect
If the device was listed as a COM port in the previous step Connect should now be able
to detect it.
%20copy-1.png?width=200&height=58&name=Bluelab-logo__Trans_RGB-medium%20(2)%20copy-1.png)