Overview
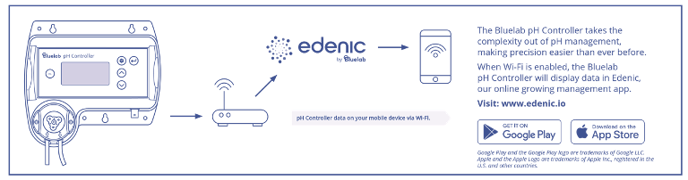
The Bluelab pH Controller takes the complexity out of pH management, making precision easier than ever before. That’s because the in-built peristaltic pump provides precise control, delivering doses within a 0.1 pH tolerance. With built-in Wi-Fi capability, if enabled, the Bluelab pH Controller Wi-Fi can display data in Edenic (an online software platform, visit Edenic.io for more information). Allowing control of pH levels anywhere, any time from your phone.
| Bluelab pH Controller Wi-Fi | |
| Built-in Wi-Fi (with option to disable) | Safety lockouts prevent excessive dosing |
| Auto-resume dosing after power loss | Precision dosing of pH adjuster with the built-in Bluelab peristaltic pump |
| Controls pH in the up (alkali) or down (acid) direction | High/low alarms to alert you when parameters are out of range |
| Dosing routine allows for effective mixing before next dose | 2-m/6-ft cable lengths for best positioning and viewing |
| When Connect to Edenic by Bluelab app | Instant alarm alerts to you phone |
| Remote monitoring | Remote Control |
| History Reporting to enable data-driven decision making | |
Register your product with Bluelab
Product Manuals:
pH Controller Wi-Fi User Manual - English
Get started:
Step 1: Connect to Edenic by Bluelab
- Download the Edenic app on your mobile Create an account and log in.
- Power pH Controller ON.
- In the app, choose Add Device and follow the instructions. The device name and 4-digit security code can be found on the back of the device or on the packaging.
For detailed instructions follow the steps here
Step 2: Mount
- Mount pH Controller on wall or hang on support ensuring probes can reach tank/reservoir. Mount the pH Controller in a location with a strong Wi-Fi signal.
- Connect power supply into the pH Controller.
- Connect the Bluelab pH and Temperature Probes into the pH Controller.
Step 3: Set up Dosing Tubes
1. Bend tube in the opposite direction and straighten by running through closed fingers.
Set up the inlet dosing tube
2. Insert one end of the dosing tube with connector into the LEFT peristaltic pump tube, marked ‘^’.
3.Cut the inlet dosing tube to the desired length, it must reach the bottom of the pH stock solution container.
Set up the outlet dosing tube
4. Insert remaining tube and connector into the RIGHT peristaltic pump tube, marked ‘v’.
5. Cut the outlet dosing tube so it sits above the maximum solution level of the tank/reservoir. The pH stock solution MUST always drip into the nutrient reservoir.
Step 4: Calibrate pH Probe
Calibration must be done before use begins (temperature probe does not require calibration but needs to be in the solution with the pH probe at calibration).
The calibration default is set at two-point calibration. If three-point calibration is required, go into the settings. Press ‘V’ to select ‘2/3pt Cal’.
- Gently twist and pull the pH probe storage cap to remove.
- Rinse the tip of both the pH and Temperature probes in fresh water, shake off excess water.
pH 7.0 calibration 1. Ensure the pH controller is on.
- Press and hold ‘CAL’ for three seconds. ‘pH 7 Calibrate’ will be displayed.
- Place both clean pH & temperature probes in the pH 7.0 calibration solution, then press ‘cal’ button.
- Calibration is complete when all the ‘[]’s on the screen become solid. The screen will display ‘OK’ and the ‘pH 7’ indicator will appear to indicate successful pH 7.0 calibration.
pH 4.0 and/or pH 10.0 calibration
- Rinse the probes in fresh tap water, shake off excess water.
- Place the pH and temperature probes in either pH 4.0 or pH 10.0 calibration solution, then press ‘CAL’ button.
- Calibration is complete when all ‘[]’s on the screen become solid. The screen will display ‘OK’ and the ‘pH 4’ or ‘pH 10’ indicator will appear to indicate successful pH calibration.
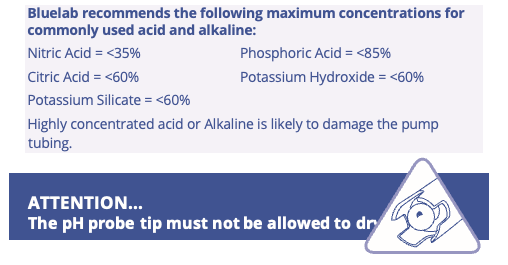
If not placing pH probe into reservoir immediately, replace the storage cap on the pH probe, ensuring there is enough KCL storage solution to submerge the probe tip. The pH probe tip must not be allowed to dry out.
After 30 days the LEDs will flash indicating calibration of the pH probe is required.
Step 5: Placement of probes
Keep the probes away from where pH up or down enters the reservoir.
- Fit the (optional) pH probe holder to the stem of the pH probe using a gentle twisting motion. DO NOT FLEX OR BEND THE PROBE STEM AS IT WILL BREAK!
- Place pH probe into reservoir and push suction cup onto side of reservoir so pH probe tip will stay submerged in solution and not get knocked around (pH probes are made of glass and are fragile!).
- Place temperature probe into the reservoir alongside the pH Probe.
The pH probe can be fully submerged.
Step 6: Set Required pH
- Press the settings button.
- Press ‘v’ to find ‘Set pH’. Press ‘enter’ to select.
- Press ‘v’ or ‘^’ until the desired pH is shown in the main display. Press ‘enter’ to save.
Step 7: Dosing Direction
- Press ‘v’ to find ‘Dose Up/Dn’. Press ‘enter’.
- Press ‘v’ or ‘^’ until the desired dose direction is shown in the main display. Press ‘enter’ to save. Press ‘Settings’ to exit.
Step 8: Set Pump On Time and Off Time
On Time is the length of time the peristaltic pump will dose for. Off Time is the delay time between doses.
A dosing cycle includes the On and Off Times. Adjust so that three dosing cycles only change the pH value by 0.1 pH.
To Set the On Time
- Press ‘Settings’ (cog icon on device). Press ‘v’ to find ‘On Time’. Press ‘enter’.
- Press ‘v’ or ‘^’ to select the dosing on time in seconds. Press ‘enter’ to save.
To Set the Off Time
- Press ‘v’ to find ‘Off Time’. Press ‘enter’.
- Press ‘v’ or ‘^’ to select the dosing off time in minutes. Press ‘enter’ to save. Press ‘Settings’ to exit.

Step 9: Set Alarms
When an alarm condition is present, the alarm symbol and pH reading will flash. All dosing will stop.
If the measurement changes back within the limits you have set, the flashing will stop, and dosing will start.
To set the High Alarm Value
- Press ‘Settings’. Press ‘v’ to select ‘Alarm High’. Press ‘enter’.
- Press ‘v’ or ‘^’ to select the desired value. Press ‘enter’ to save.
To set the Low Alarm Value
- Press ‘v’ to select ‘Alarm Low’. Press ‘enter’.
- Press ‘v’ or ‘^’ to select the desired value. Press ‘enter’ to save.
Turn the Alarm On
- Press ‘^’ to find ‘Alarm’. Press ‘enter’.
- Press ‘v’ or ‘^’ to select ‘on’. Press ‘enter’ to save and activate the alarm. Alarm indicator will appear on the screen. Press the settings button (the cog icon on the device) to exit.
Step 10: Prime Pump
Pump Ovrde’ allows you to fill the inlet and outlet tubes with dosing solution before first use and also to manually dose the reservoir.
- Press ‘Settings’. Press ‘v’ to select ‘Pump Ovrde’. Press ‘enter’.
- Press ‘v’ to manually operate the pump.
Step 11: Set Mode
Use ‘mode’ to select the pH controller function.
To Set ‘monitor’ mode (default setting) 1. Press ‘Settings’. Press ‘v’ to select ‘Mode’. Press ‘enter’.
- Press ‘v’ or ‘^’ to select ‘monitor’, then ‘enter’ to save.
Step 12: Choose your Pump Speed
Your Bluelab pH Controller has a variable speed pump. The default setting is 100% which will deliver 120 ml/min of the stock solution. You can adjust you pump speed to deliver less solution per minute by adjusting the pump speed percentage.
- Press 'Settings'. Press 'v' to select 'Pump Speed'. Press Enter
- Press 'v' to select the required percentage.
- Press 'Enter' to save.
To Set ‘control’ mode
- Press ‘v’ to select ‘Mode’. Press ‘enter’.
- Press ‘v’ or ‘^’ to select ‘control’, then ‘enter’ to save. Press ‘settings’ to exit.
- The controller will begin a countdown sequence prior to commencing control mode.
Edenic by Bluelab
Probe maintenance:
Your Bluelab pH and EC probes need to be cleaned and calibrated regularly to extend life and get accurate measurements. Refer to the following articles:
- Bluelab pH Probes: Care, maintenance and storage - Clean, hydrate and calibrate your pH probe monthly.
Still can’t find what you're looking for? Contact Support