To follow this guide you must have Edenic by Bluelab app running on a mobile device with Bluetooth enabled. See getting started with Edenic
If you are provisioning your device for the first time you can skip step 2 from the guide below. Your device is in provisioning mode by default when new.
Step One: Accessing Add Device
Open Edenic on your mobile device and sign in with your Edenic account. In the app select the “add Devices” button found the Device Index screen, then select Wi-Fi Devices.
Also ensure Bluetooth is switched on on your phone and Edenic has been allow permissions to access it.

Step Two: Entering Provisioning Mode
Pro Controller Wi-Fi and Guardian Wi-Fi
On the Bluelab Guardian Wi-Fi/Bluelab Pro Controller Wi-Fi short press the “Settings” button to open the settings menu.

Once in the settings menu short press the Temperature “Units/Selection” button to enter Provisioning mode. The device should show “Prou” and it’s four-digit Security Code.
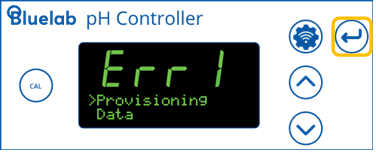
Note: The device will remain in Provisioning mode for 2 minutes before returning to Monitor mode or Control mode (Pro Controller only). You can exit Provisioning mode at any time by pressing the settings button again.

pH Controller Wi-Fi
On the Bluelab pH Controller Wi-Fi short press the "Settings” button, press the “v” button to scroll down till Wi-Fi is selected. Press “⏎” button to enter Wi-Fi menu.
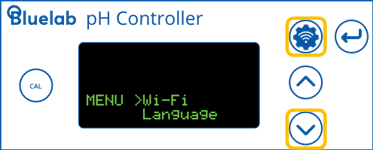
Once in the Wi-Fi menu select Provisioning then the “⏎” button to enter Provisioning mode.
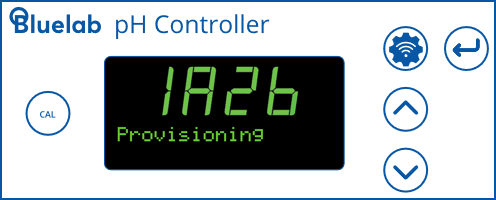
The device should show “Provisioning” and it’s four-digit Security Code.
Note: The device will remain in Provisioning mode for 2 minutes before returning to Monitor mode. You can exit Provisioning mode at any time by pressing the settings button again.
Step Three: Connecting to Wi-Fi Device
Option A: Bluetooth Search
Selecting “Search Bluetooth” will start a Bluetooth search and any available devices will be displayed.

Selecting the appropriate device from the list of available devices will take you to the Device Setup screen. To ensure you select the correct device, the device name should match the name on the QR Code sticker on the device.

Option B: Scan QR Code
Select “Scan QR Code” and scan the QR Code on the back of the device.
 |
 |
This will take you straight to the Setup Device screen.
Step Four: Device Setup
Here you need to give the device a name and provide it with your Wi-Fi network credentials. If added via Bluetooth scan you will also need to enter the Security Code displayed on the device or found on the QR Code sticker on the device. You can view available Wi-Fi Networks by selecting “View Wi-Fi networks”. This will provide a list of Wi-Fi Networks that the device is able to connect too.

Once all required details have been filled out, select “Continue” to configure the device. You should see a success message once the device has been successfully configured and connected to the network.

Reprovisioning Complete
