If you haven't already created an IntelliGrow account, please do that first.
You will need to connect your IntelliClimate and/or IntelliDose controllers to your preferred gateway:
Windows or IntelliLink (Please inquire if you would like an IntelliLink)
Once you have connected your devices, refresh the page so that you can see your devices. It should look like this:
When you are configuring your IntelliDose or IntelliClimate, make sure you Save (bottom right) any changes you make.
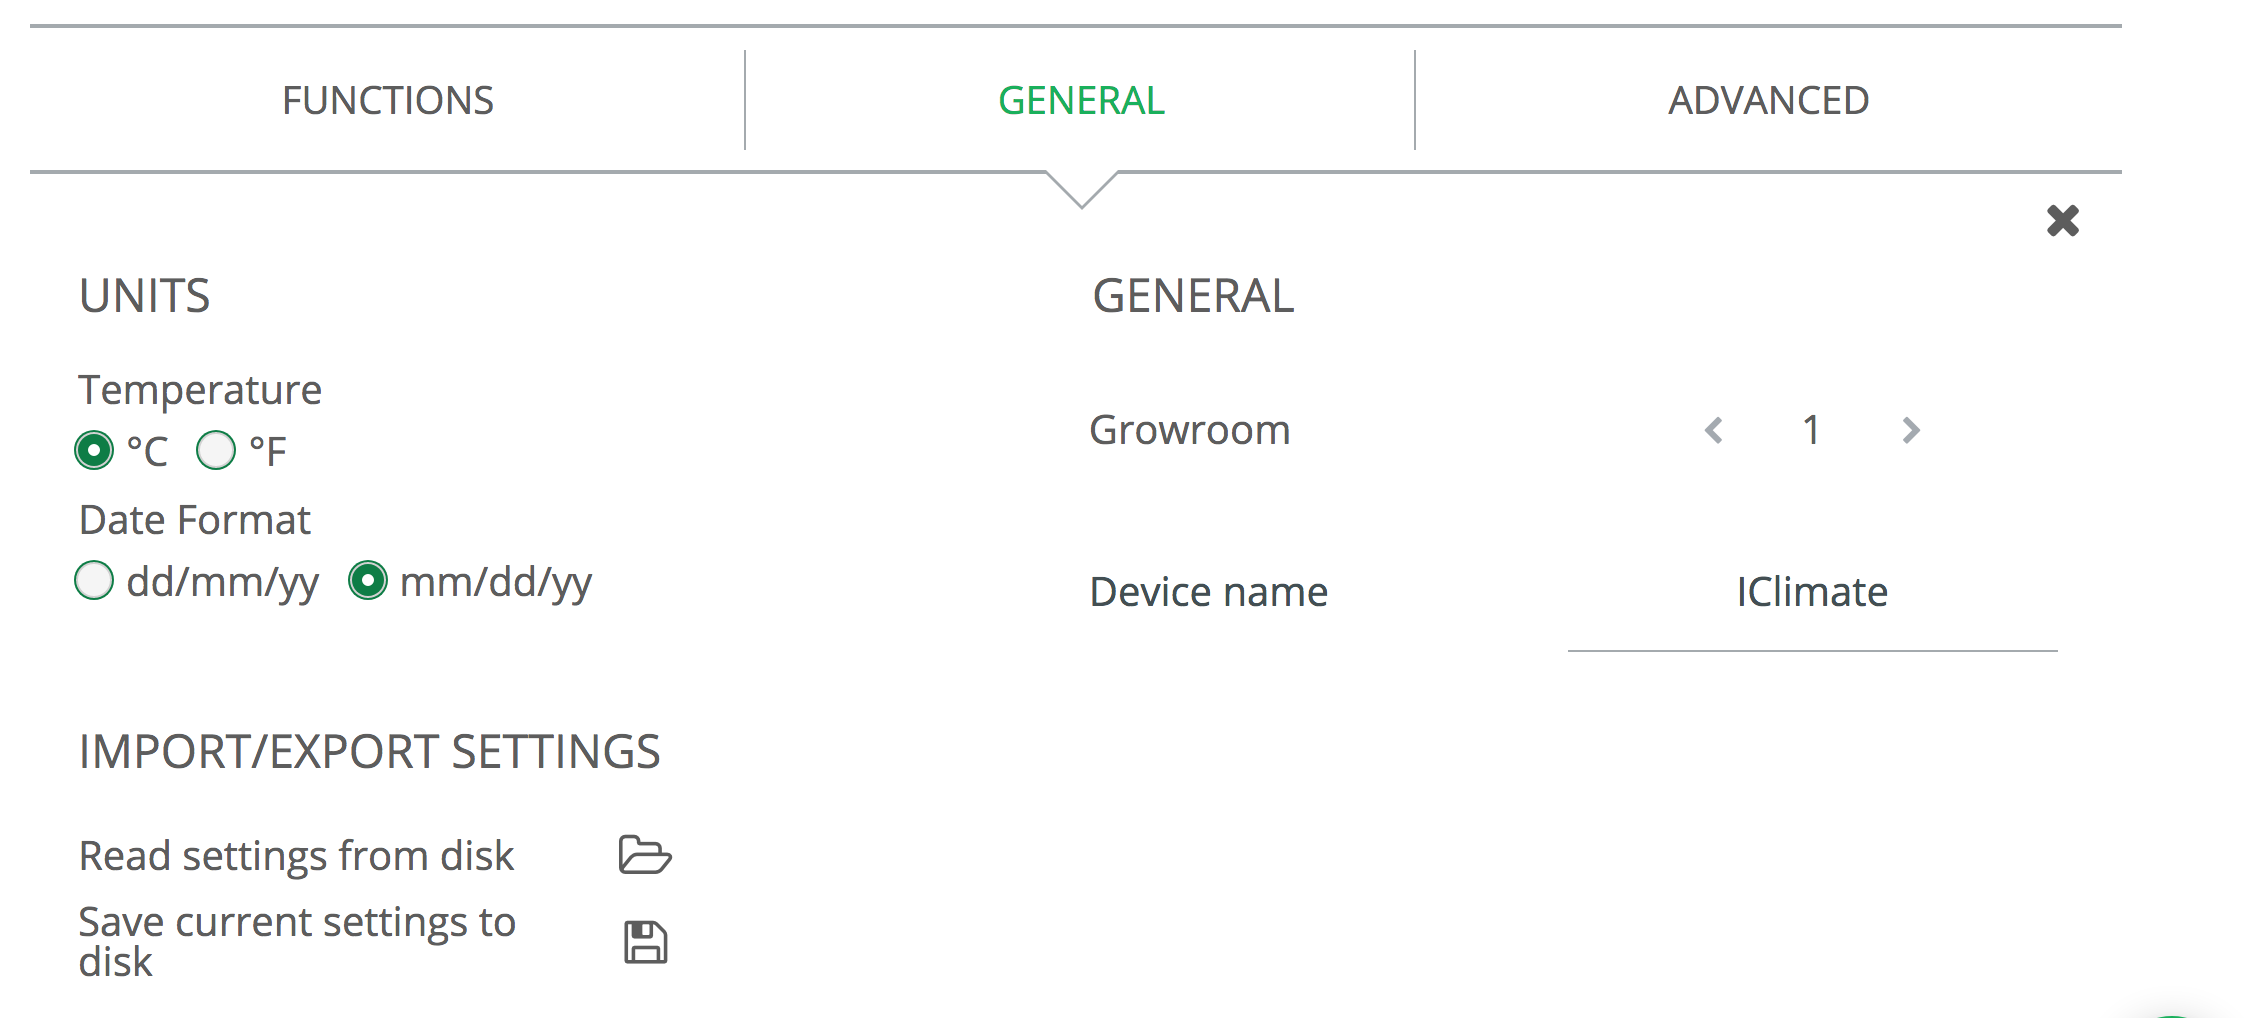
You should start setting up your devices by configuring things like units, device names etc.
You can scroll down to the bottom of the page and make those changes in the 'General' section. See below:
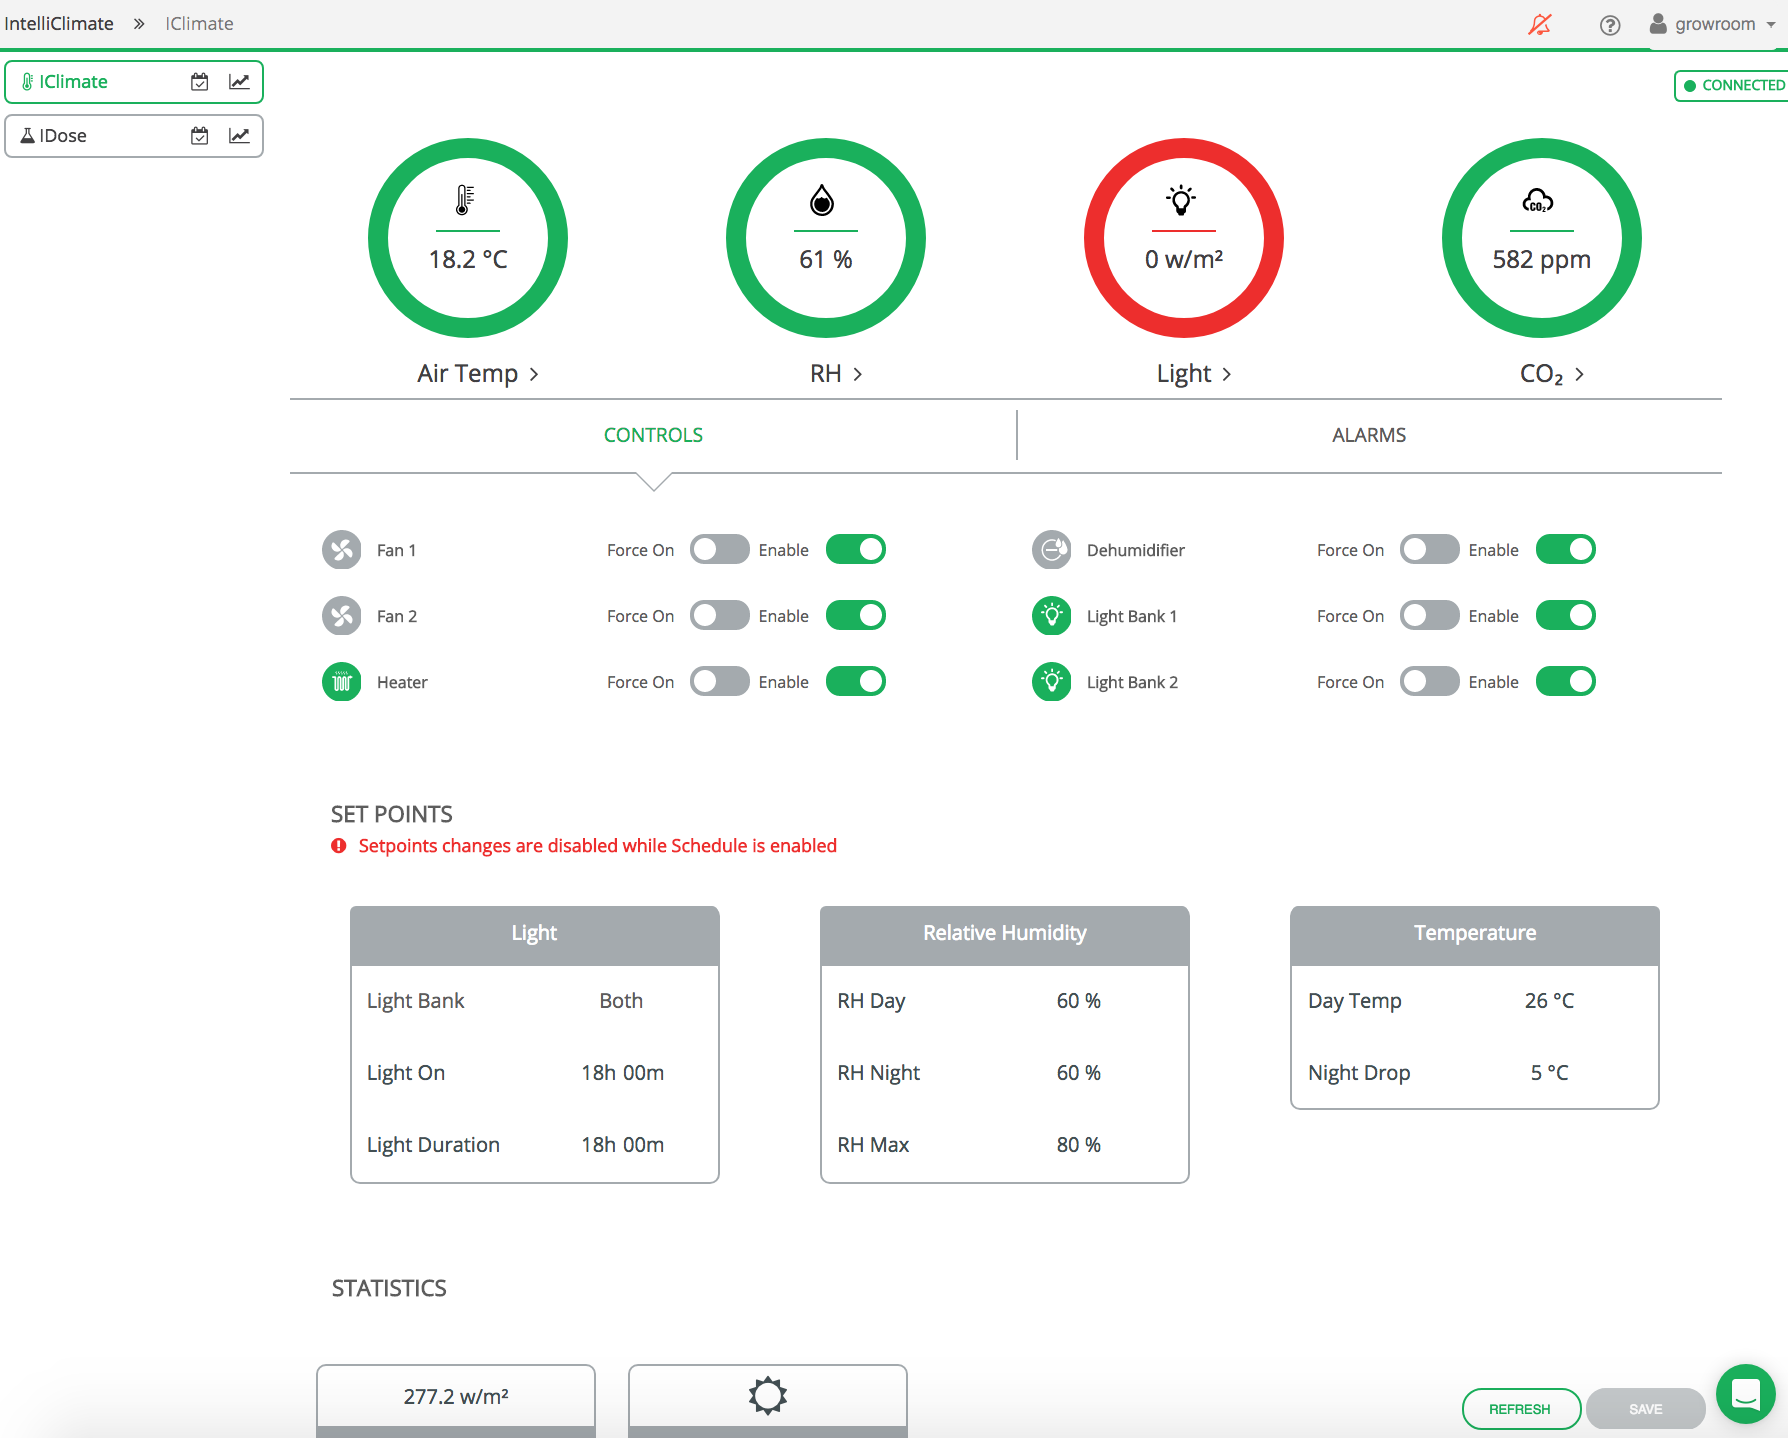
You'll see some gauges on your dashboard. The gauges indicate the condition of your growing area.
Green means everything's okay.
Red means your growing area needs some attention.
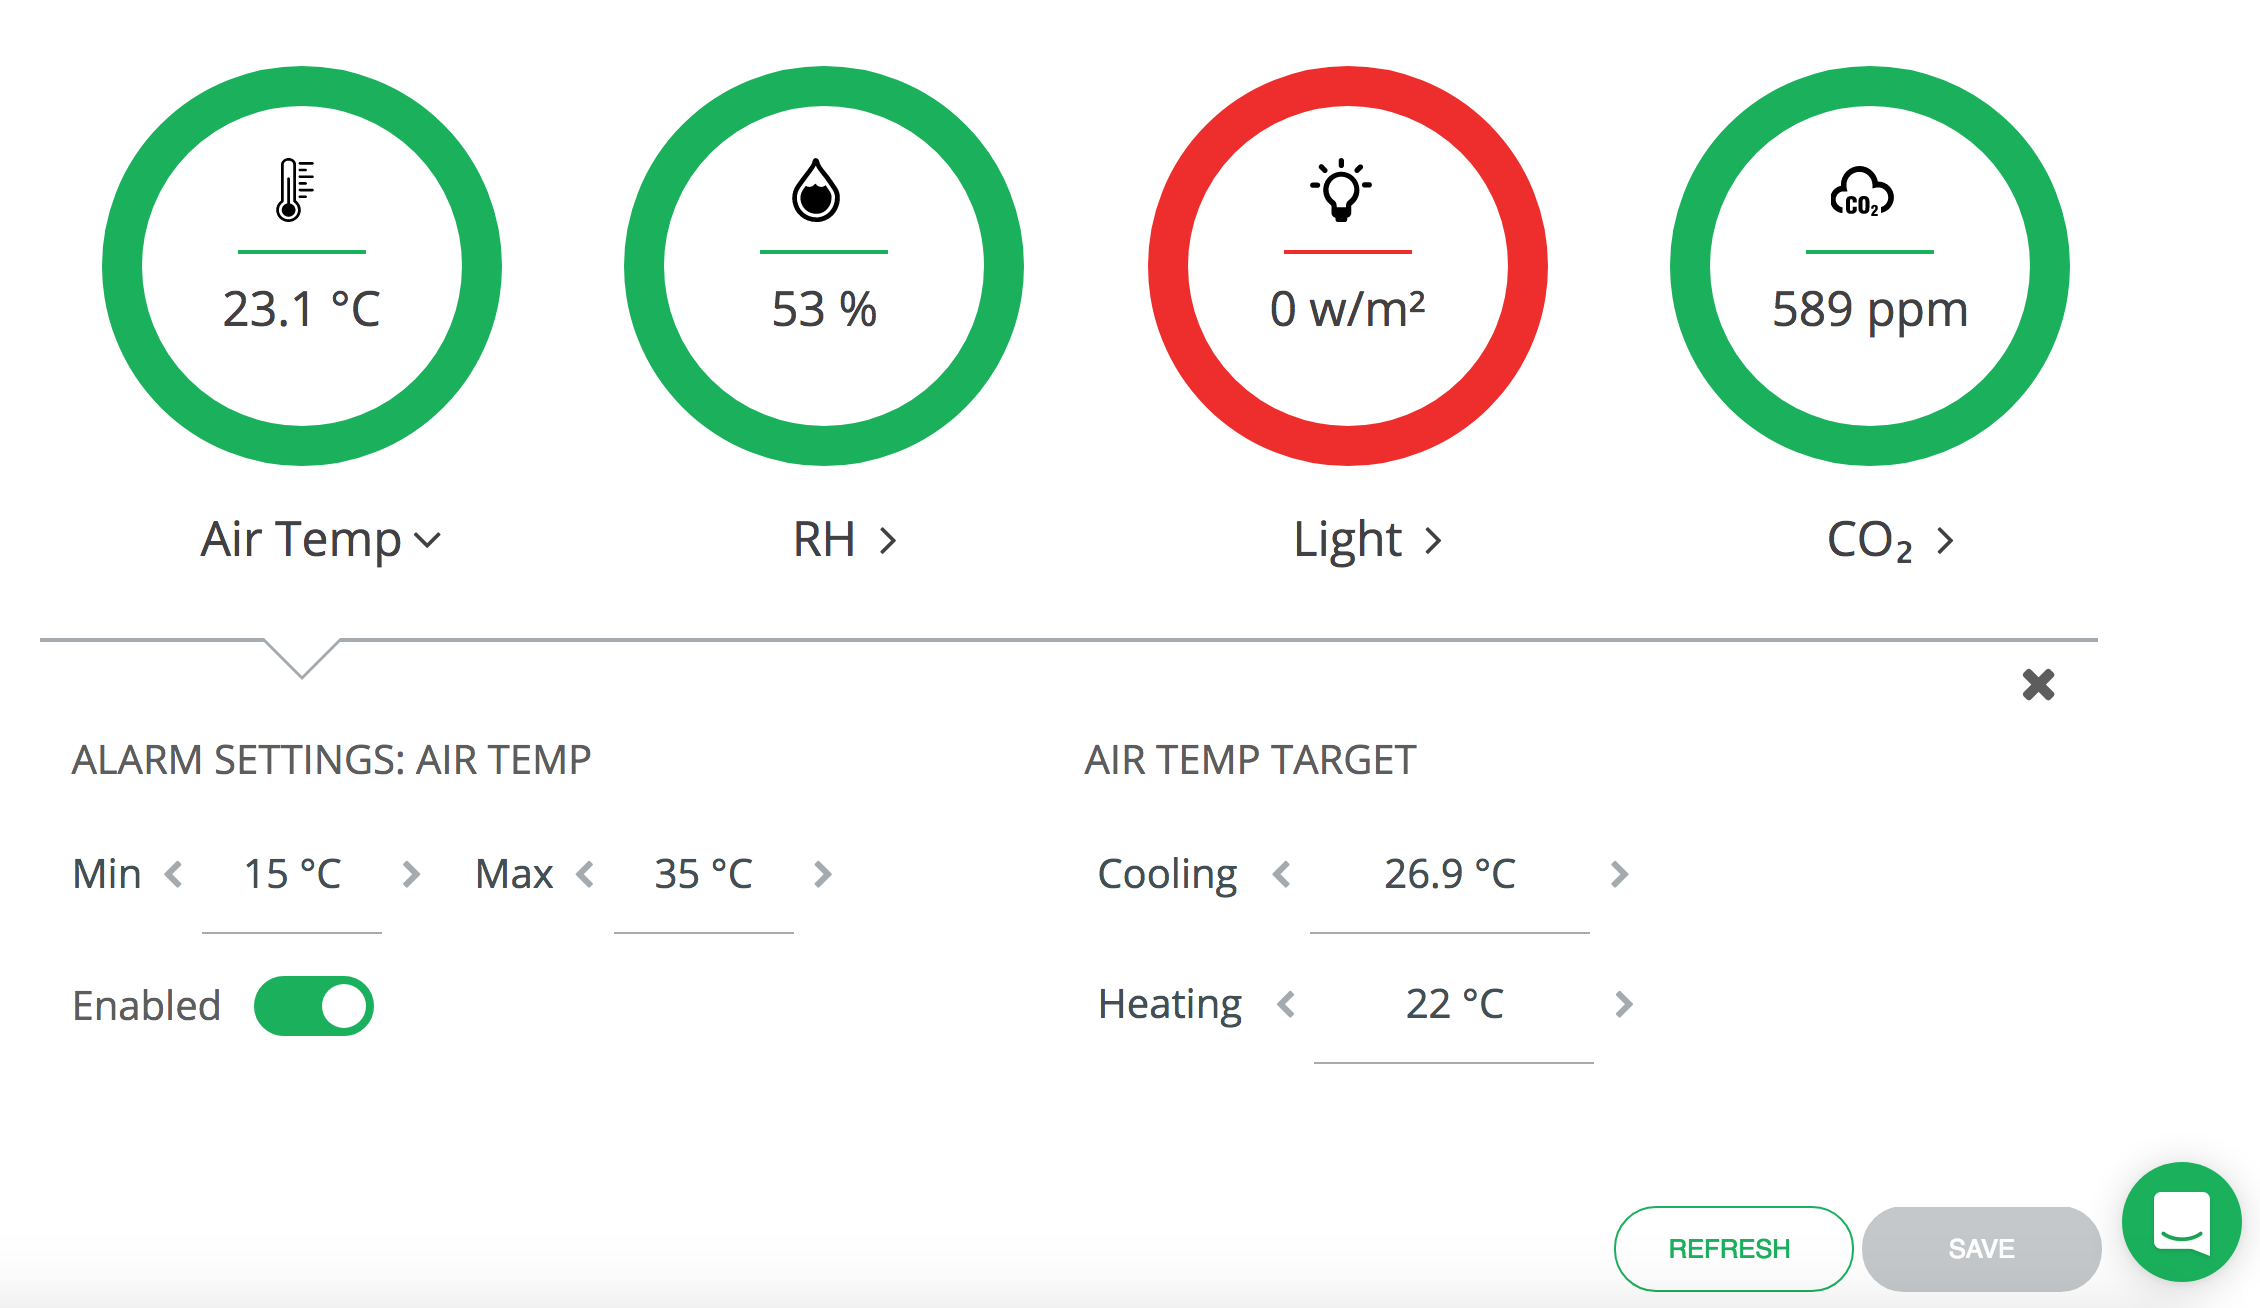
You might want to pay more attention to that reading so you can click on them to drill in for more information on what's happening.
When you click on a gauge, you can also set up your alarms so that you'll know as soon as something needs your attention.
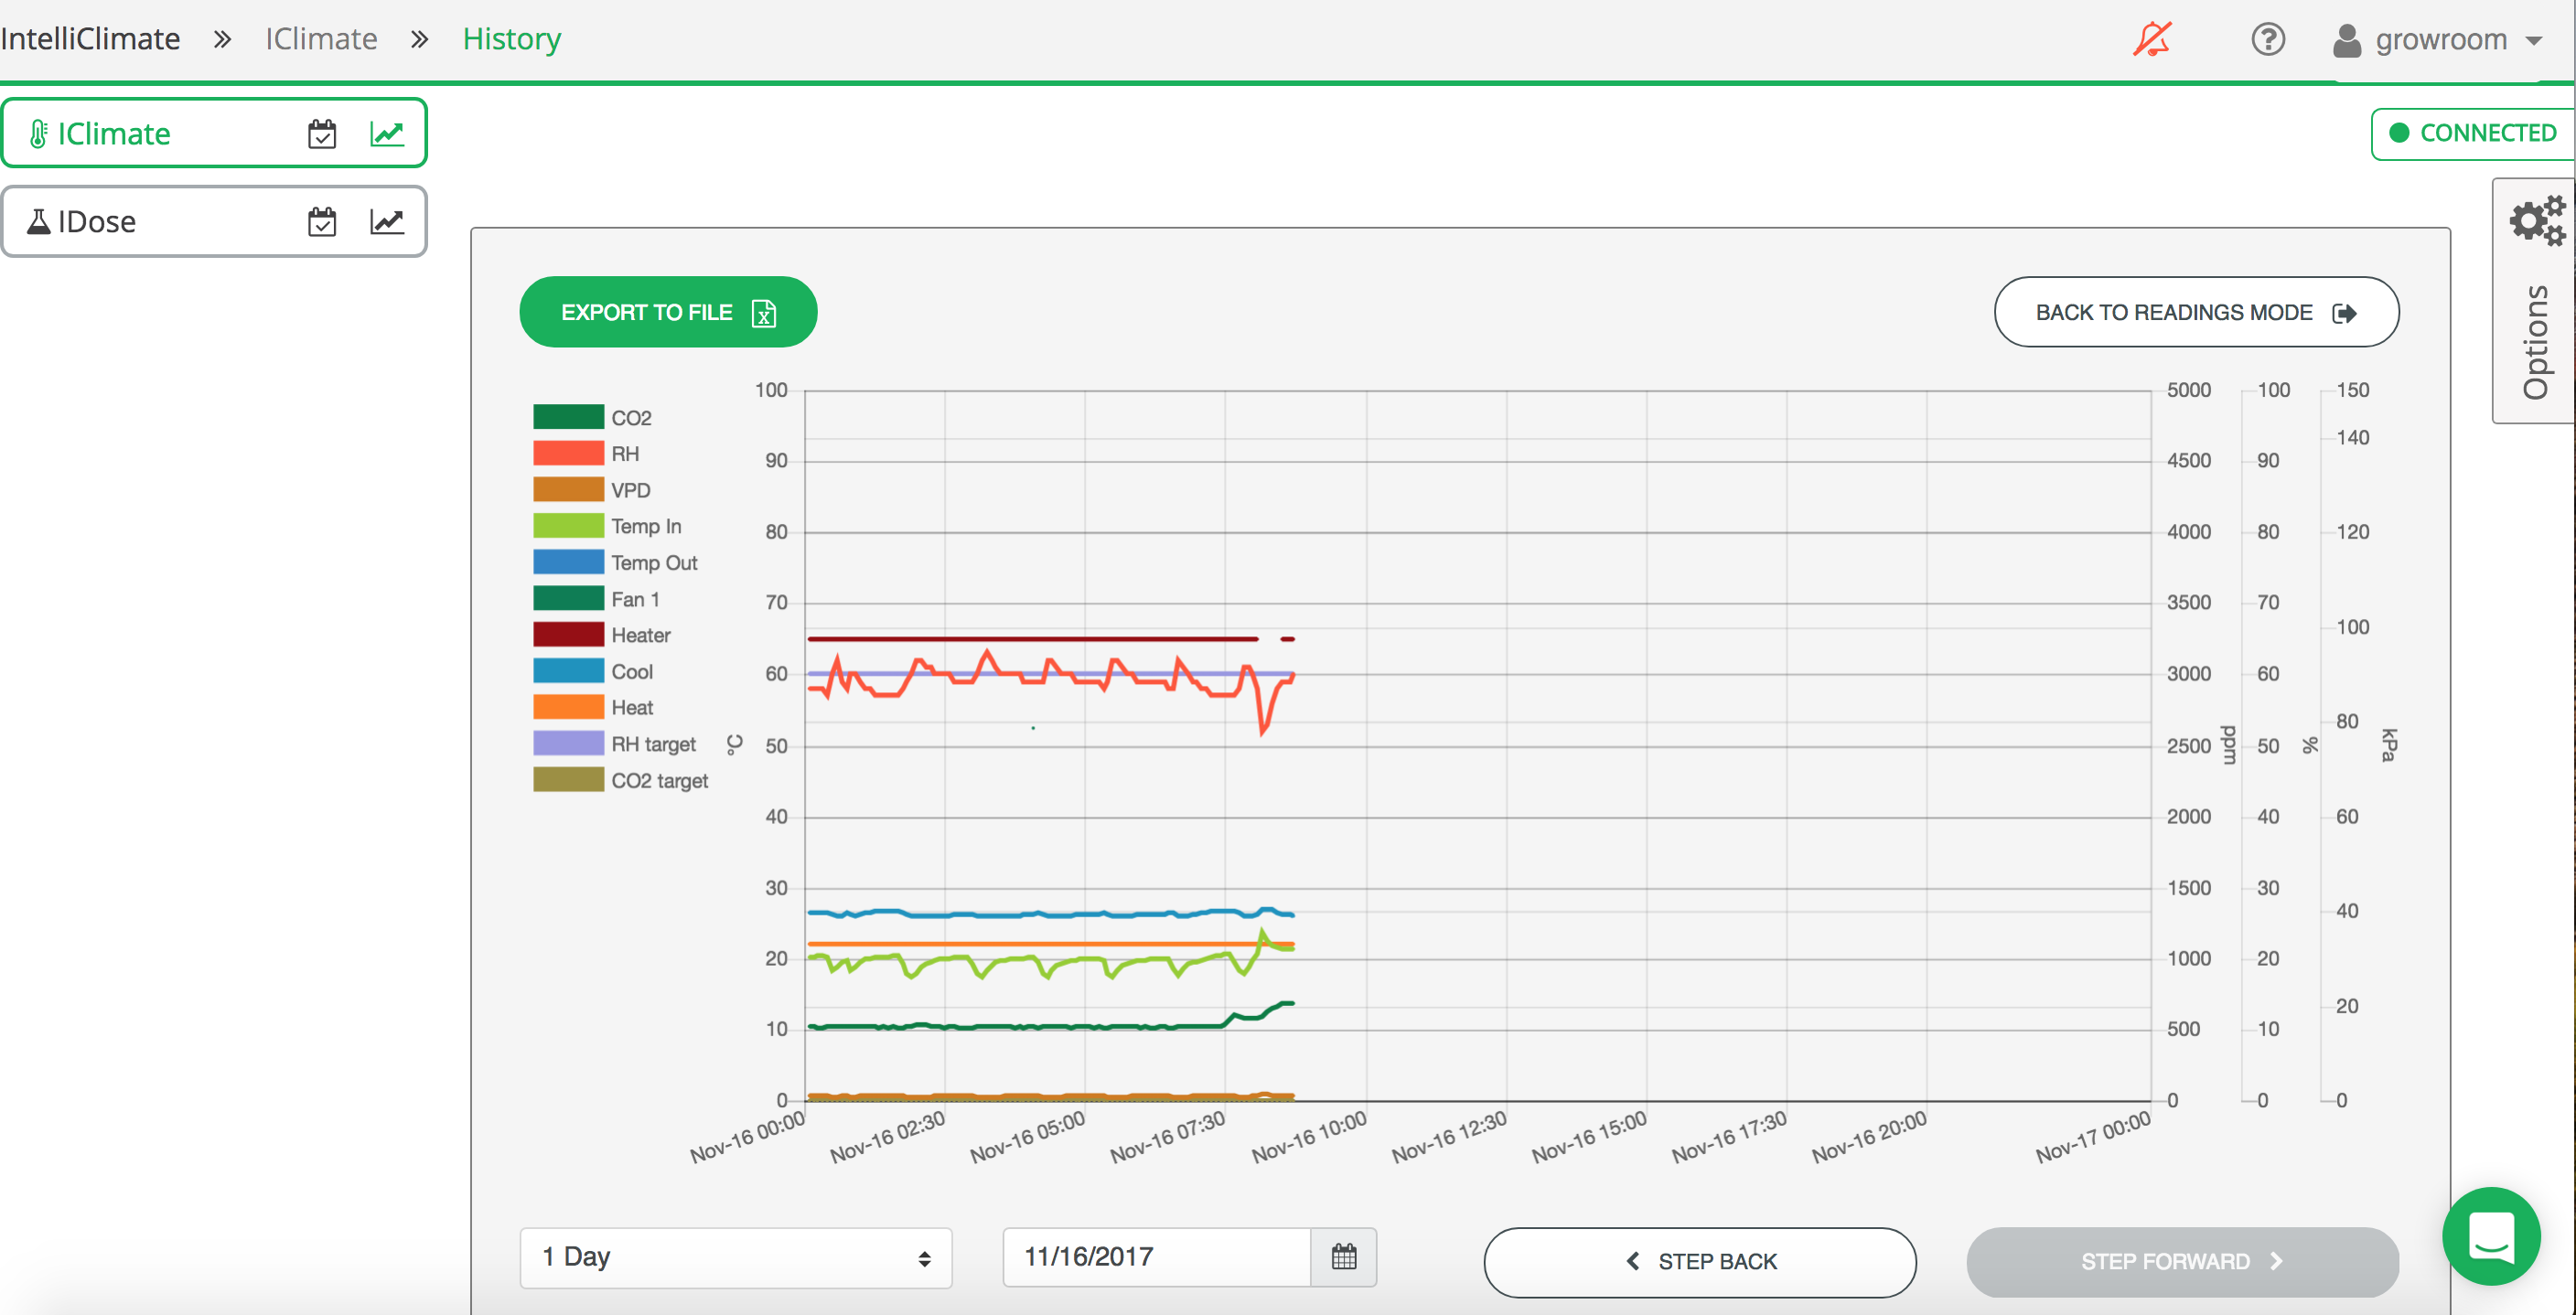
The History tab is the best place to spot issues and understand your grow area, IntelliGrow records your controller history so that you can easily view data and help guide future growing decisions.
To view your History, check out the History Tab.
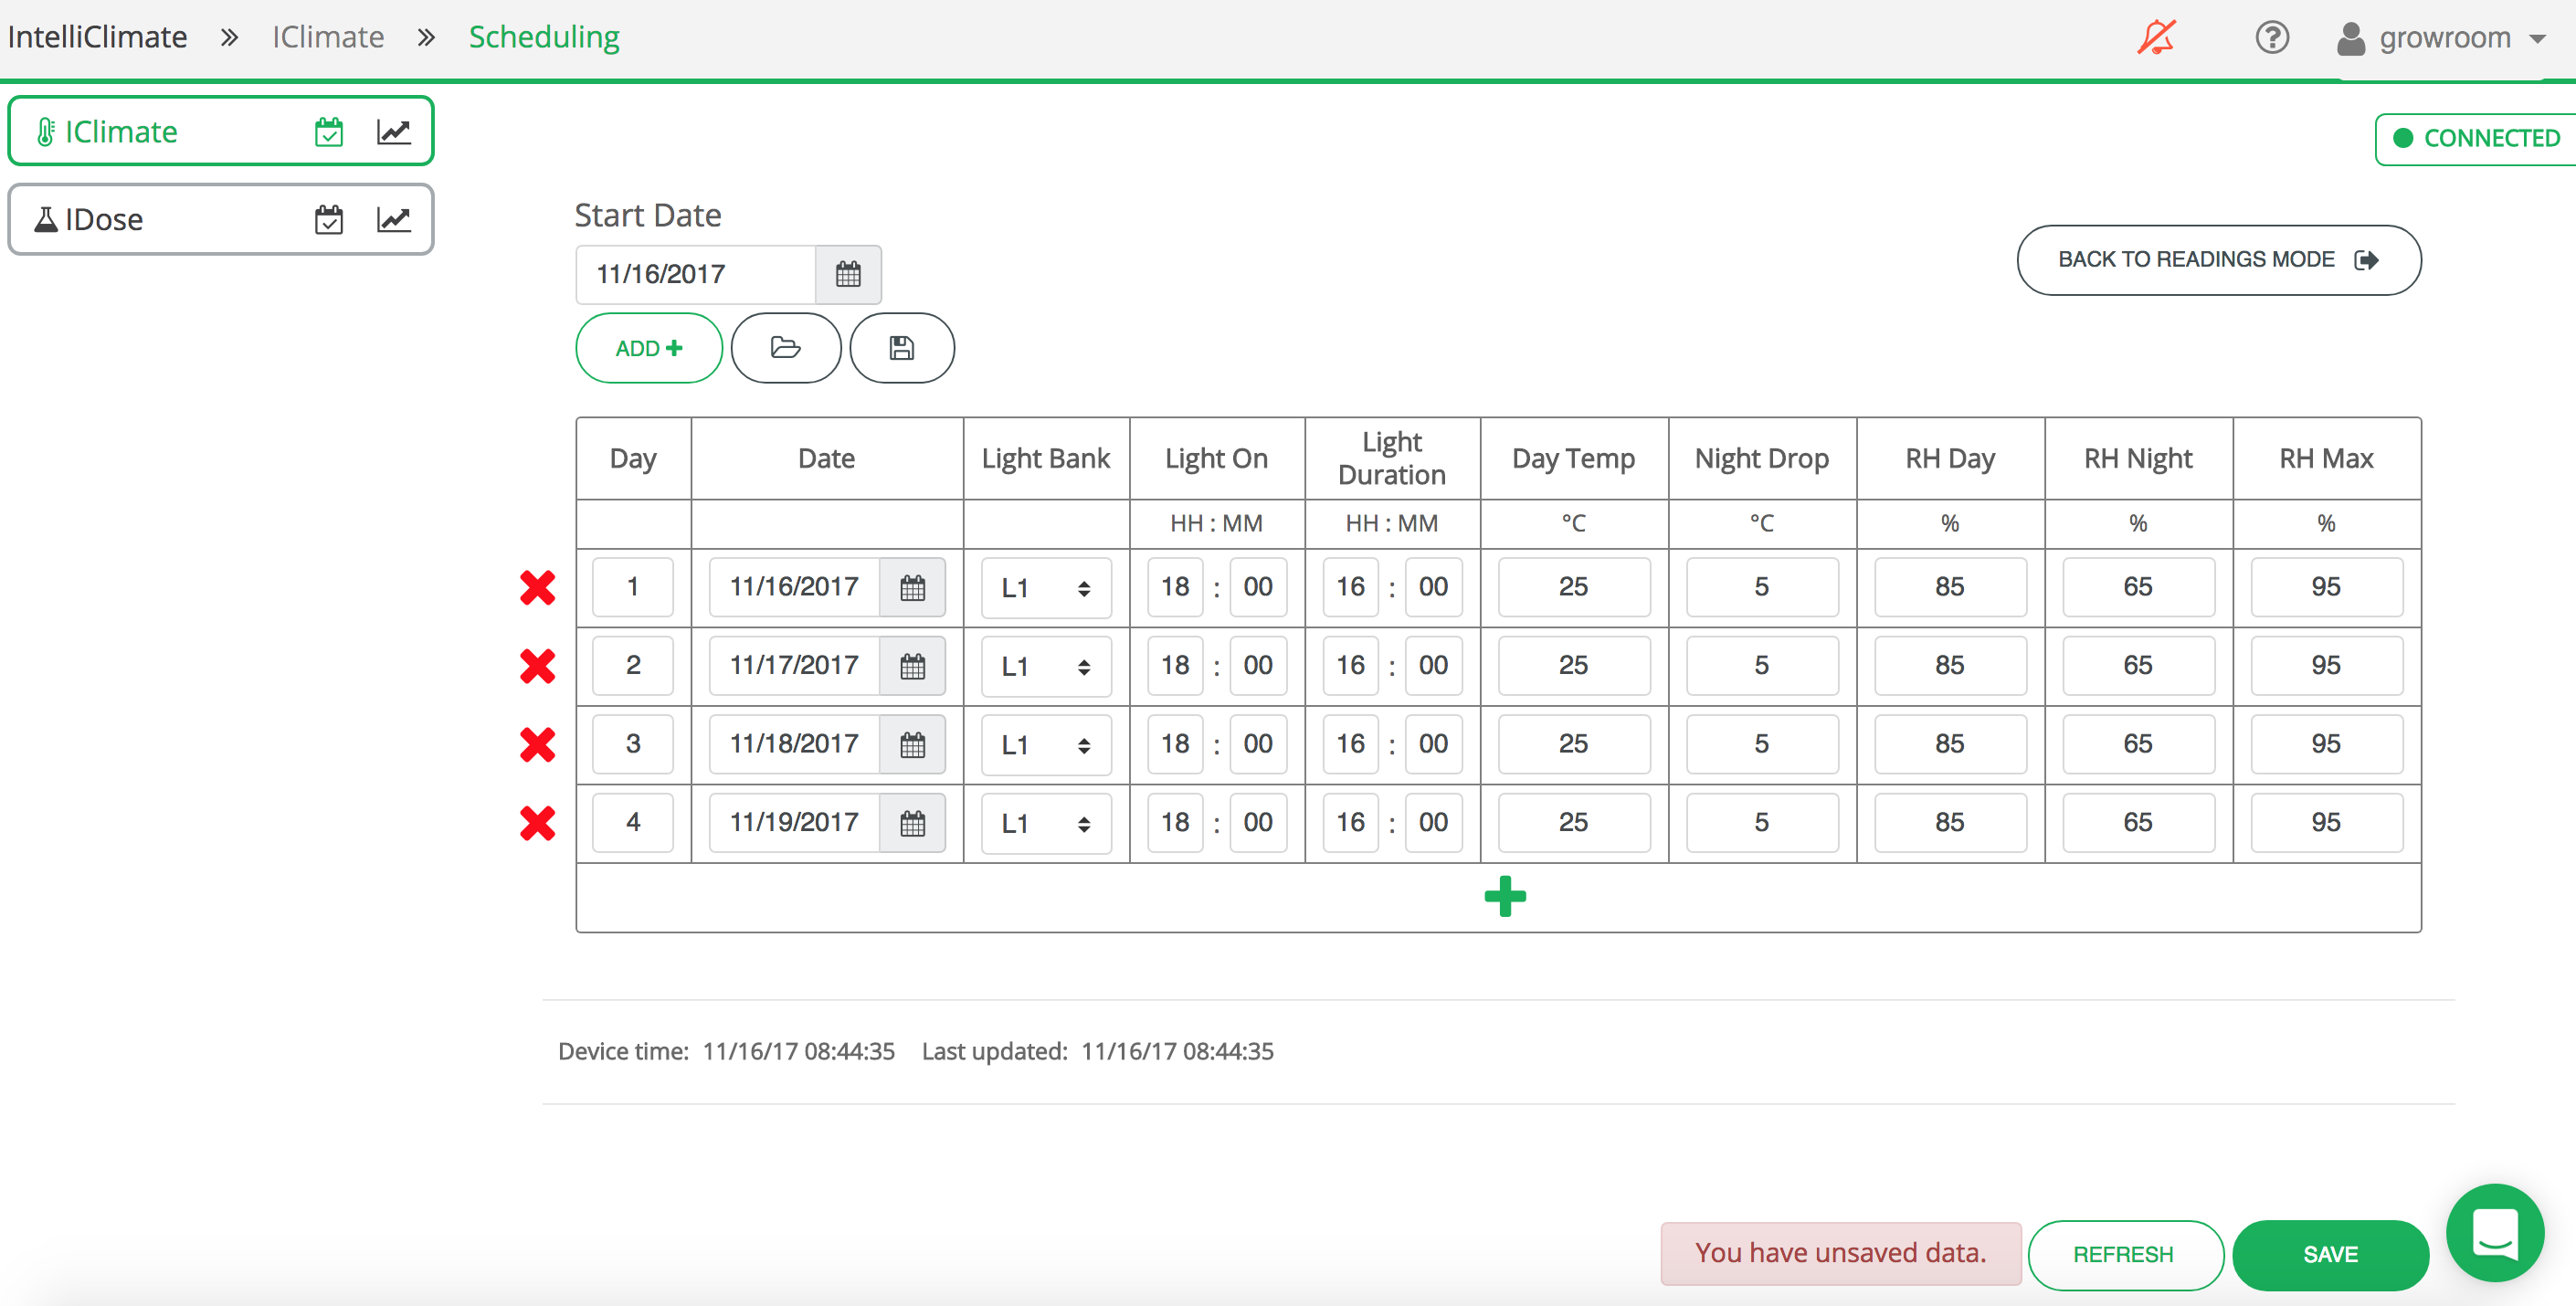
If you want to free yourself up from the hard work of configuring setpoints every day, then the schedule function is your best friend.
You can read more about Setting up the Schedule function here.
You should be all set to grow beautiful crops.
If you need any help, you can click on our Help toggle to the right or email support@autogrow.com.
Happy Growing 🌱